Section outline

    • Course Introduction

      Ubuntu 24.04 LTS (Noble Numbat) is a free, open-source Linux operating system developed by Canonical. It is one of the world's most popular Linux distributions, widely used for servers, cloud computing, software development, virtualization, networking, and desktop computing.

      This course focuses on installing Ubuntu Server 24.04 LTS (Minimal Installation), providing a lightweight and secure operating system suitable for production servers, web hosting, virtualization, containers, databases, streaming servers, and enterprise deployments.

      Students will learn how to perform a clean installation, configure storage and networking, create users, secure the system, and prepare Ubuntu for real-world server environments.


      About Ubuntu

      • Operating System: Ubuntu Server
      • Current LTS Release: Ubuntu 24.04 LTS (Noble Numbat)
      • Developer: Canonical Ltd.
      • Kernel: Linux Kernel
      • Architecture Support: x86_64 (AMD64), ARM64, IBM POWER, IBM Z, RISC-V (availability varies)
      • Package Manager: APT (Advanced Package Tool)
      • Default Package Format: DEB
      • Release Type: Long Term Support (LTS)

      Why Ubuntu Server?

      • Ubuntu Server is designed for:
      • Web servers
      • Database servers
      • Cloud infrastructure
      • Docker & Kubernetes
      • Virtual Machines
      • File servers
      • Media streaming
      • AI & Machine Learning
      • Enterprise applications
      • Development environments

      Ubuntu 24.04 LTS Features

      • Long Term Support (5 years standard support)
      • Linux Kernel 6.8
      • Improved security
      • Faster boot process
      • Better hardware compatibility
      • Cloud-ready deployment
      • Native support for containers
      • Snap package support
      • Stable APT package management
      • UEFI and Secure Boot support

      What is Minimal Installation?

      A Minimal Installation installs only the essential operating system components required to boot and operate the server.

      Benefits include:

      • Smaller disk usage
      • Lower RAM consumption
      • Reduced attack surface
      • Faster updates
      • Better performance
      • Easier maintenance
      • Install only the software you need

      Prerequisites

      Before starting this course, learners should have:

      • Basic computer knowledge
      • A PC or virtual machine
      • Minimum 2 GB RAM (4 GB recommended)
      • At least 25 GB storage
      • Internet connection
      • USB flash drive (8 GB or larger) for physical installation

      Download Ubuntu

      Official Ubuntu Server download:

      https://ubuntu.com/download/server

      Official Ubuntu Desktop download:

      https://ubuntu.com/download/desktop


      System Requirements

      Minimum

      • 1 GHz 64-bit CPU

      • 1 GB RAM

      • 2.5 GB free disk space (minimal)

      Recommended

      • Dual-core 64-bit processor

      • 4 GB RAM

      • 25 GB SSD/HDD

      • Internet connection


      Course Learning Objectives

      After completing this course, learners will be able to:

      • Understand Ubuntu Server fundamentals
      • Download the official Ubuntu ISO
      • Create a bootable USB installer
      • Perform a minimal Ubuntu installation
      • Configure storage partitions
      • Configure networking
      • Create administrative users
      • Enable SSH access
      • Install software using APT
      • Update and secure the server
      • Verify a successful installation

      License

      Ubuntu is free and open-source software.

      • License: GNU General Public License (GPL) and other compatible open-source licenses, depending on the software component.
      • The Linux kernel is licensed under GPL v2.
      • Many included packages are distributed under their respective open-source licenses.

      Ubuntu itself is distributed by Canonical Ltd.


      Official Resources


      Course Outcome

      By the end of this course, students will have a fully functional Ubuntu Server 24.04 LTS minimal installation and the knowledge required to deploy, manage, and maintain Linux servers for development, hosting, cloud infrastructure, and enterprise environments.

    • Download Ubuntu 24.04 LTS

      1. Visit the official Ubuntu download page.
      2. Download the latest Ubuntu 24.04 LTS Desktop ISO image.
      3. Save the ISO file to your computer (for example, in the Downloads folder).

      Official Downloads


      Create a Bootable USB Drive with Rufus

      Requirements

      • USB flash drive (8 GB or larger)
      • Ubuntu 24.04 LTS ISO
      • Rufus

      Warning: Creating the bootable USB will erase all data on the USB drive.

      Step 1 – Launch Rufus

      Open Rufus after downloading it.
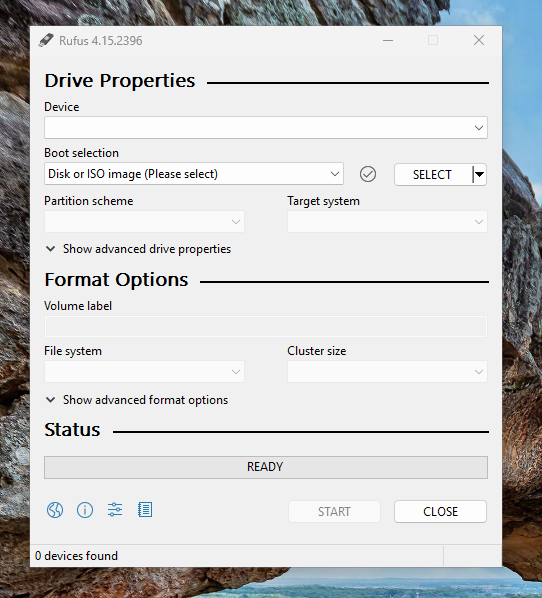
      Rufus

      Step 2 – Insert the USB Drive

      Connect your USB flash drive and select it under Device.

      Step 3 – Select the Ubuntu ISO

      1. Click SELECT.
      2. Browse to the downloaded Ubuntu 24.04 ISO.
      3. Click Open.

      Step 4 – Configure Rufus

      For most modern computers, use:

      Option Value
      Device Your USB drive
      Boot selection Ubuntu 24.04 ISO
      Partition scheme GPT
      Target system UEFI (non CSM)
      File system FAT32 (Default)
      Cluster size Default

      If your computer only supports Legacy BIOS, choose:

      • Partition scheme: MBR
      • Target system: BIOS (or UEFI-CSM)

      Step 5 – Start Creating the USB

      Click START.

      When prompted:

      • ISOHybrid image detected → Select Write in ISO Image mode (Recommended).
      • If Rufus asks to download additional files, click Yes.
      • Confirm the warning that the USB drive will be erased by clicking OK.

      Step 6 – Wait for Completion

      Rufus will write the Ubuntu image to the USB drive. This typically takes around 5–10 minutes, depending on your USB device.

      Step 7 – Finish

      When the status changes to READY:

      1. Click CLOSE.
      2. Safely eject the USB drive.

      Boot from the USB

      1. Insert the USB drive into the target computer.
      2. Power on the computer.
      3. Open the Boot Menu (commonly F12, F11, Esc, or F9, depending on the manufacturer).
      4. Select the USB drive.
      5. Choose Try or Install Ubuntu.
      6. Follow the on-screen installation wizard to install Ubuntu 24.04 LTS.
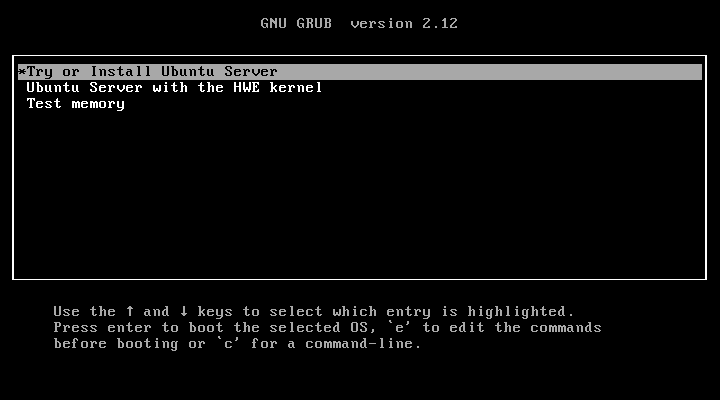
    • After Booting from USB you be viewing this 
      boot1

      Select "Try or Install Ubuntu Server " Press Enter 
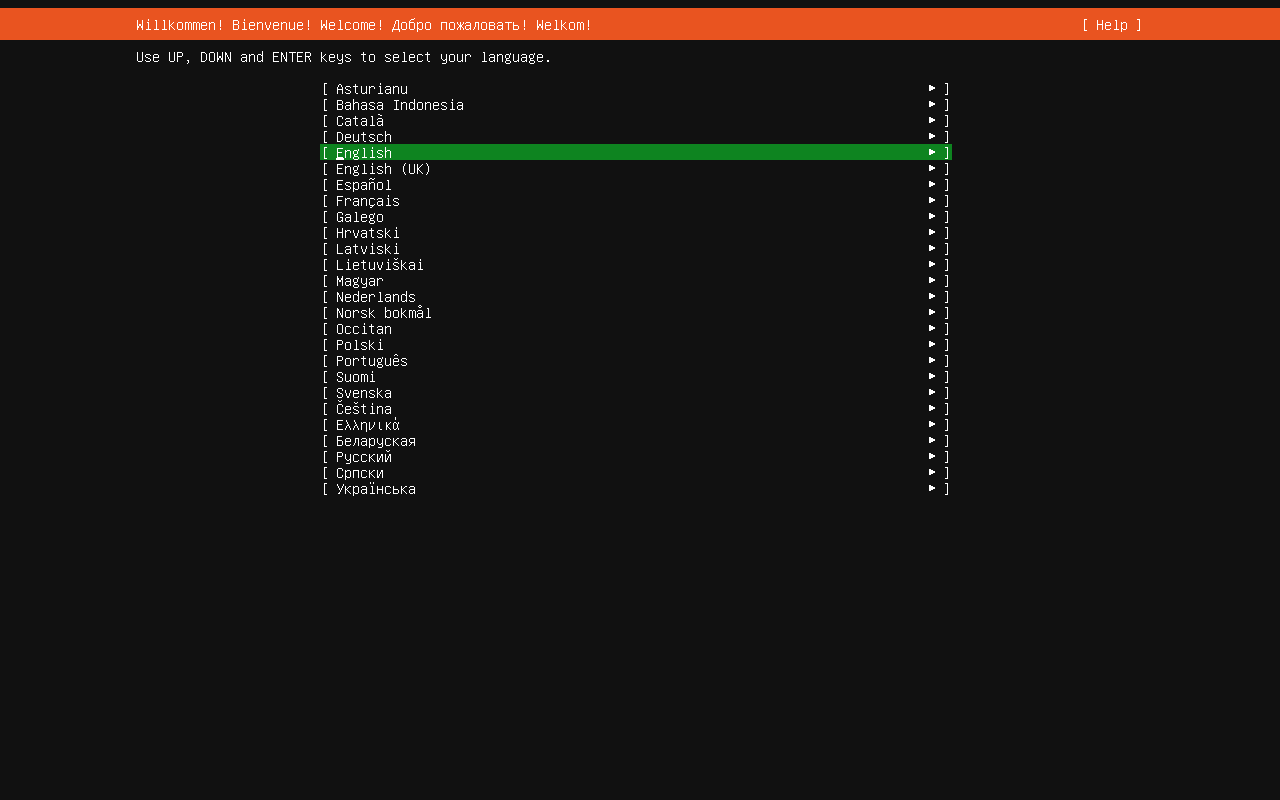
      boot2

      Select English Language 

      boot3

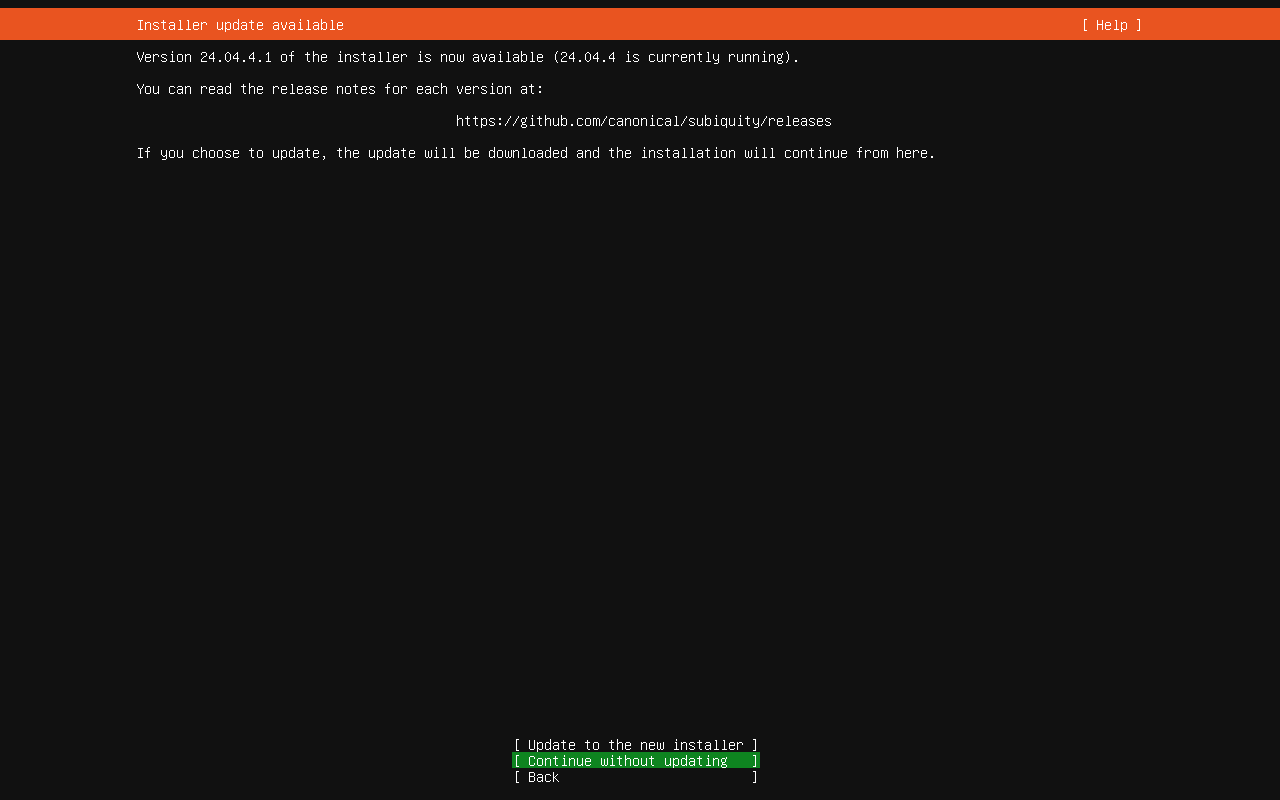
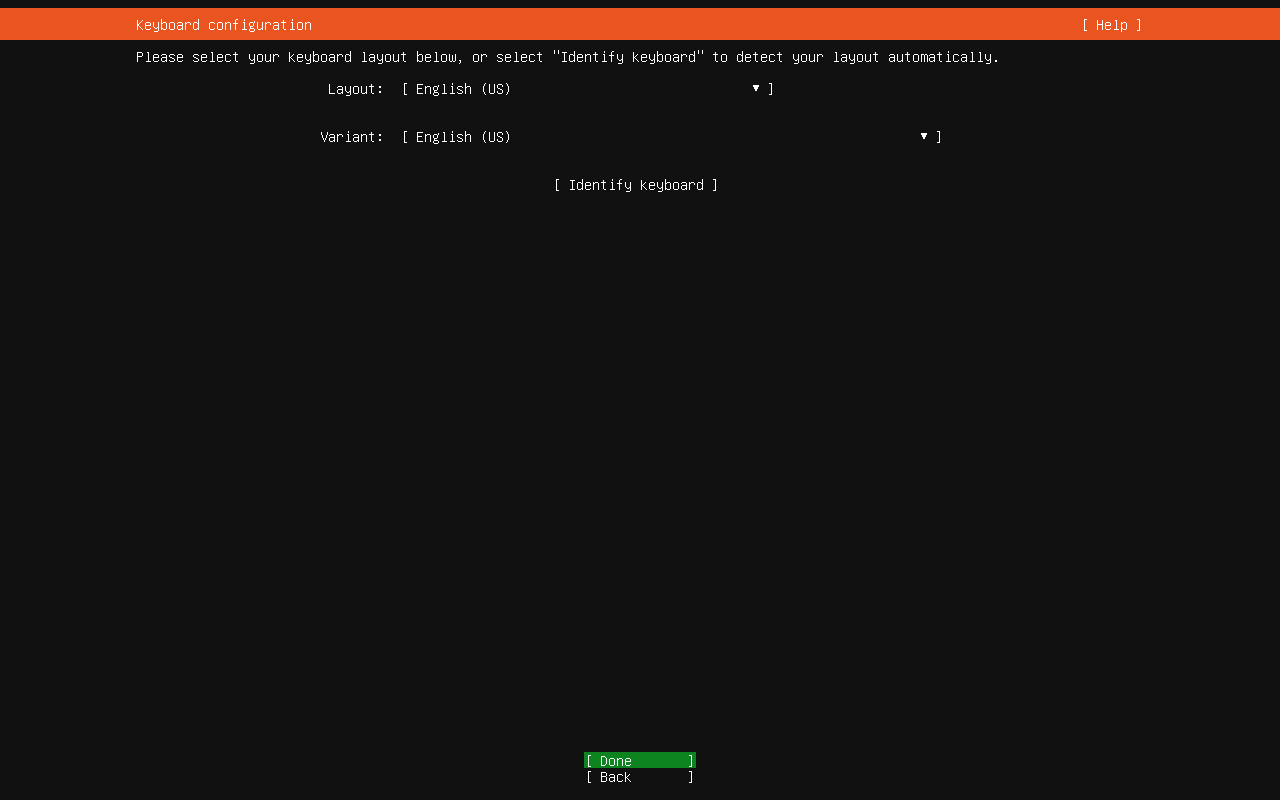
      Do not update installer just continue without Update
      boot4

      Just Press enter Once more 

      boot5

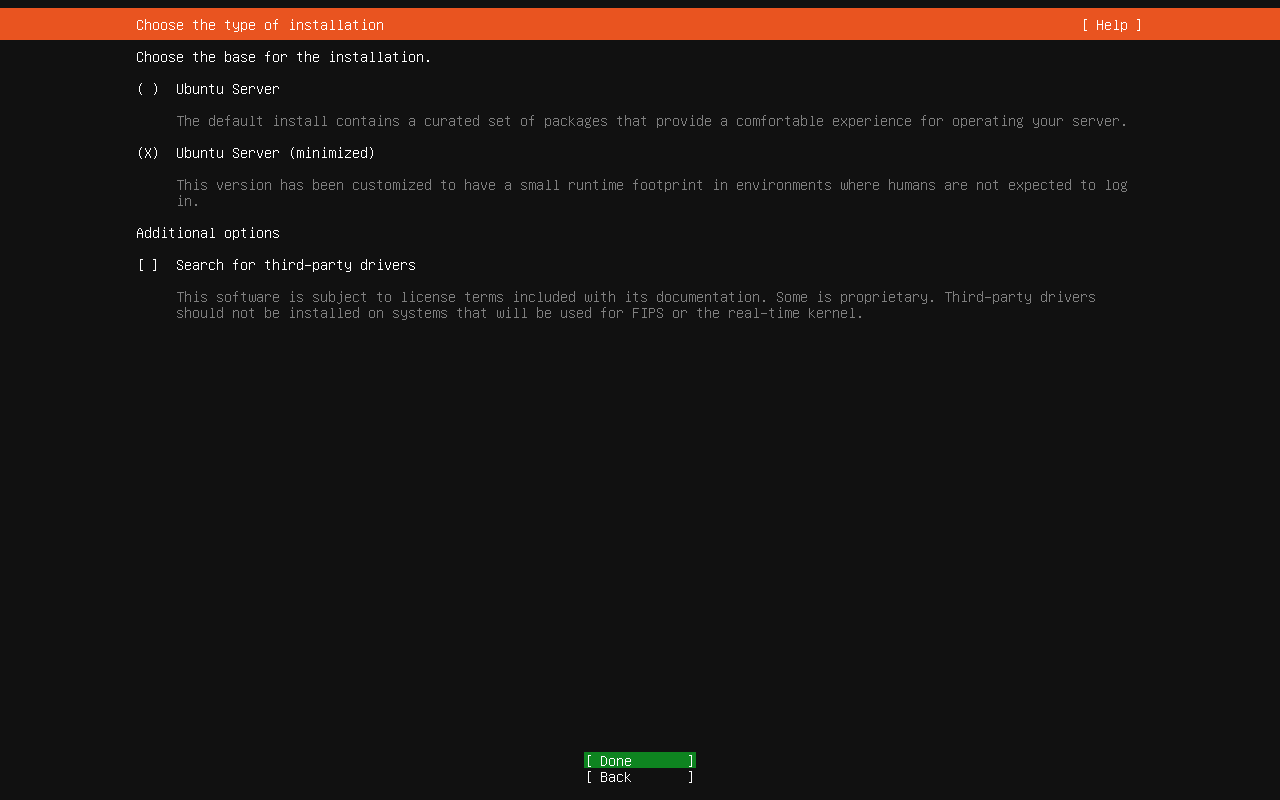
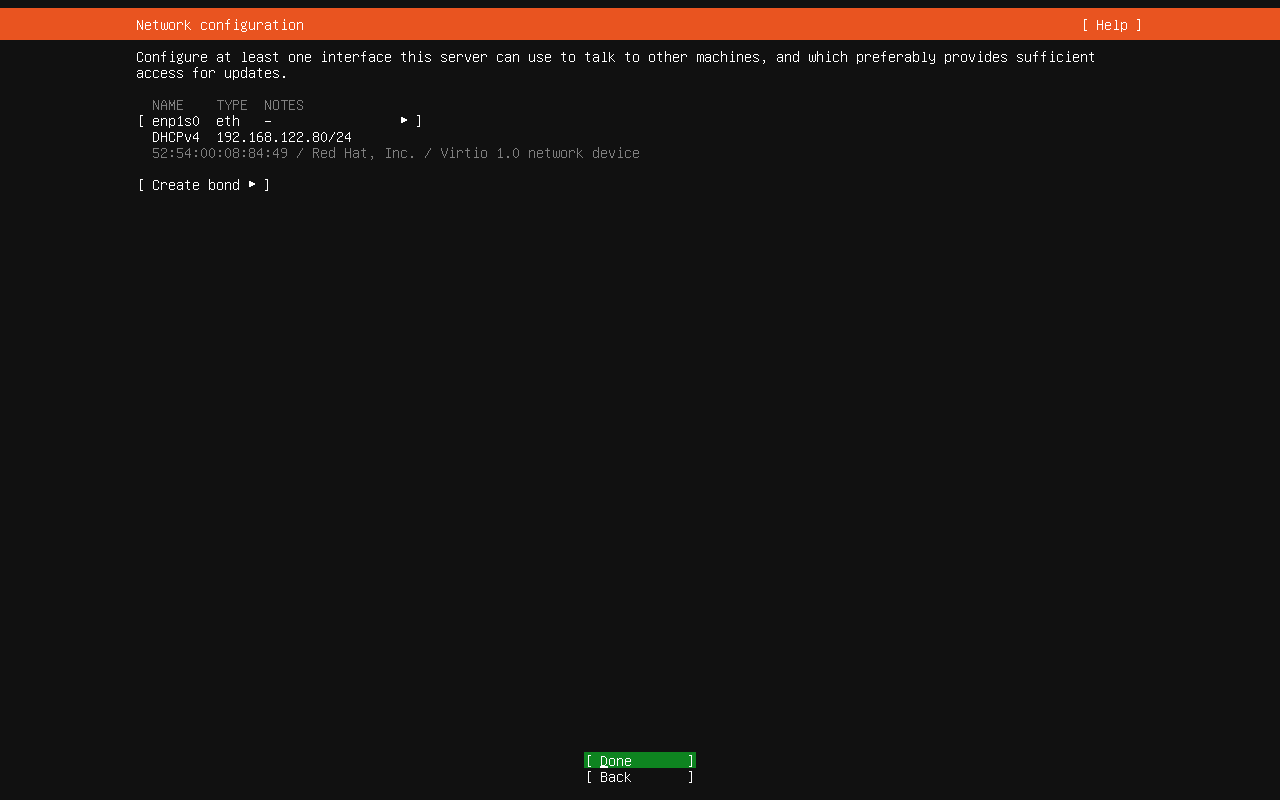
      Select Ubuntu server minimize , use arrow key for focus and space to select , After selection focus on Done and Press Enter 
      boot6

      Wait for few seconds , this will show you DHCP ip , If DHCP ip not shown Check LAN cable , hit back and then Done wait for 2-3 sec
      boot7

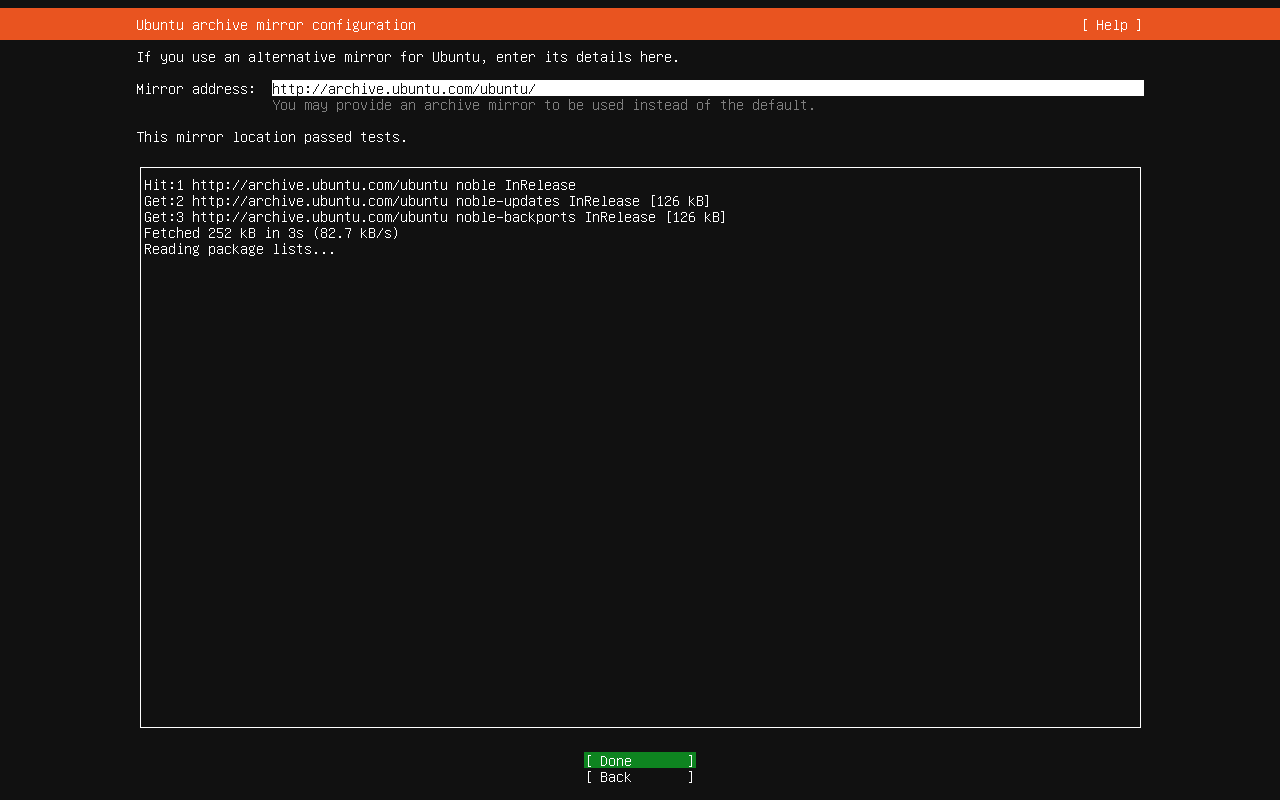
      Wait for few seconds so that , Wait until Ubuntu test mirror , Once completed select Down , this will take up to 2 minutes , depends on your internet speed
      boot8

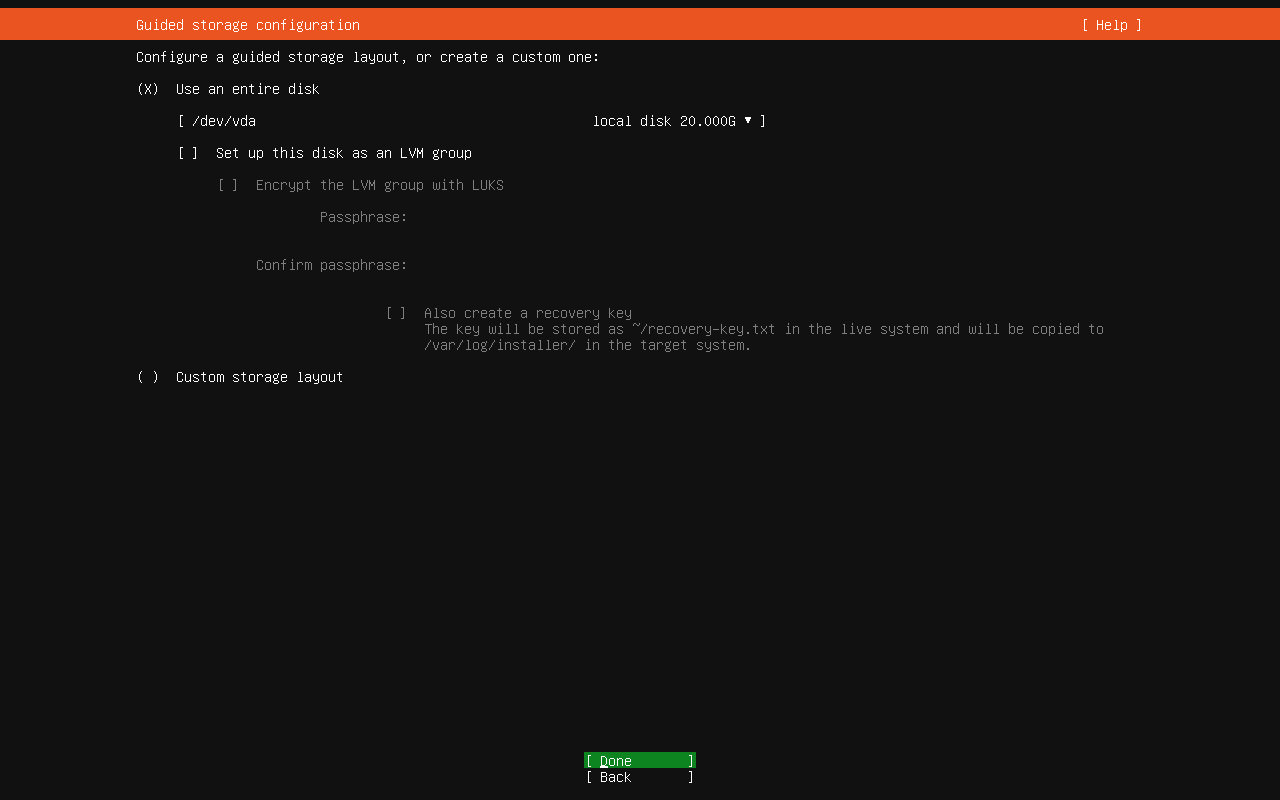
      De-Select  "Set up This disk as an LVM group" then select Done 
      boot9

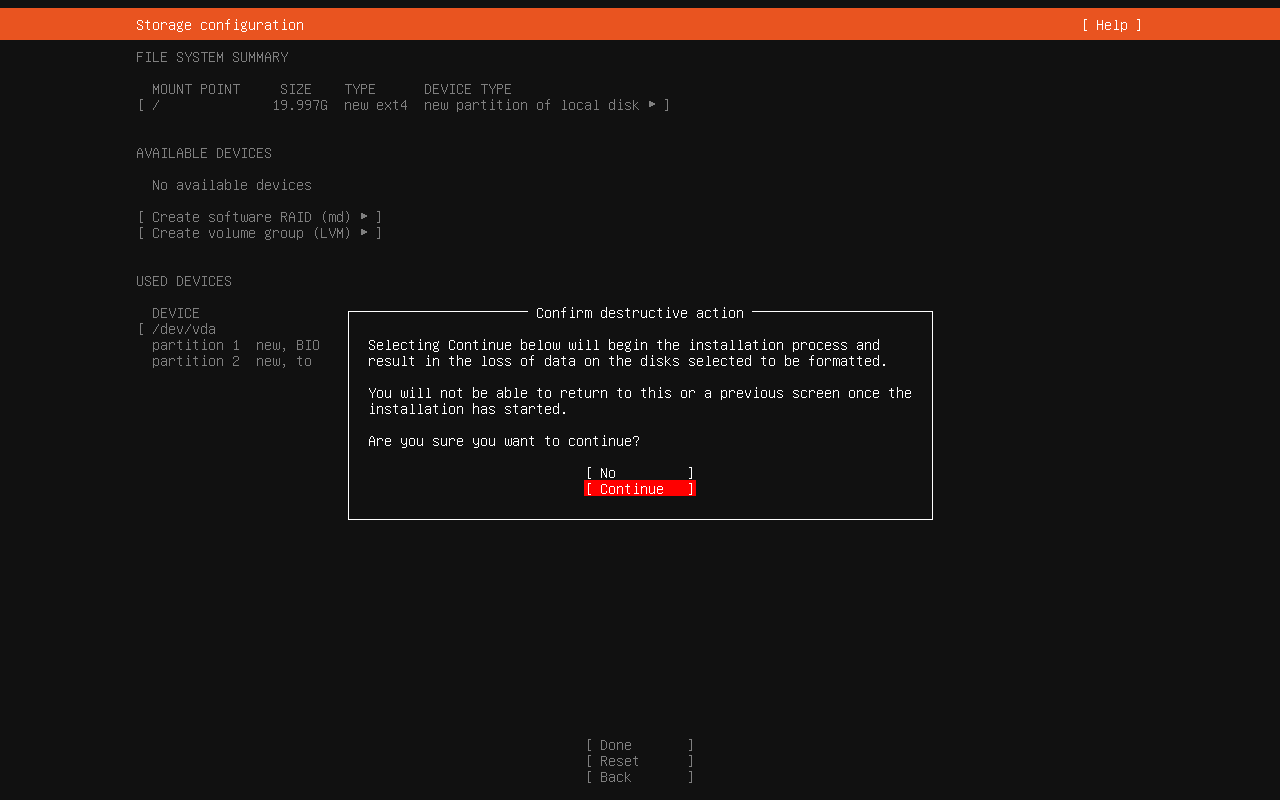
      On next page select Done and then continue 
      boot10

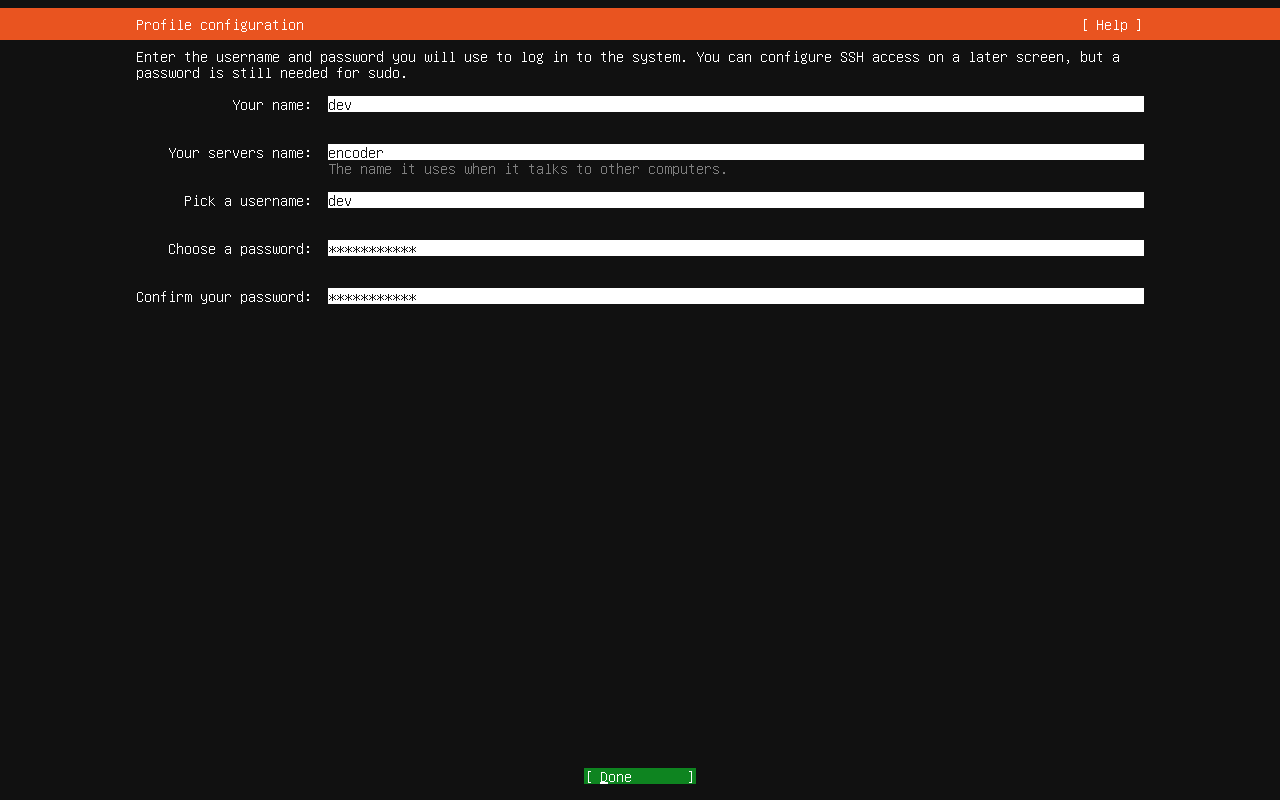
      Enter This details same as provided or firmware upgrade will not work

      Your name :- dev
      
      Your servers name :- encoder
      
      Pick a user name :- dev
      
      Choose a Password :- Mahadev@123
      
      Confirm your password :- Mahadev@123

      Than select Done 
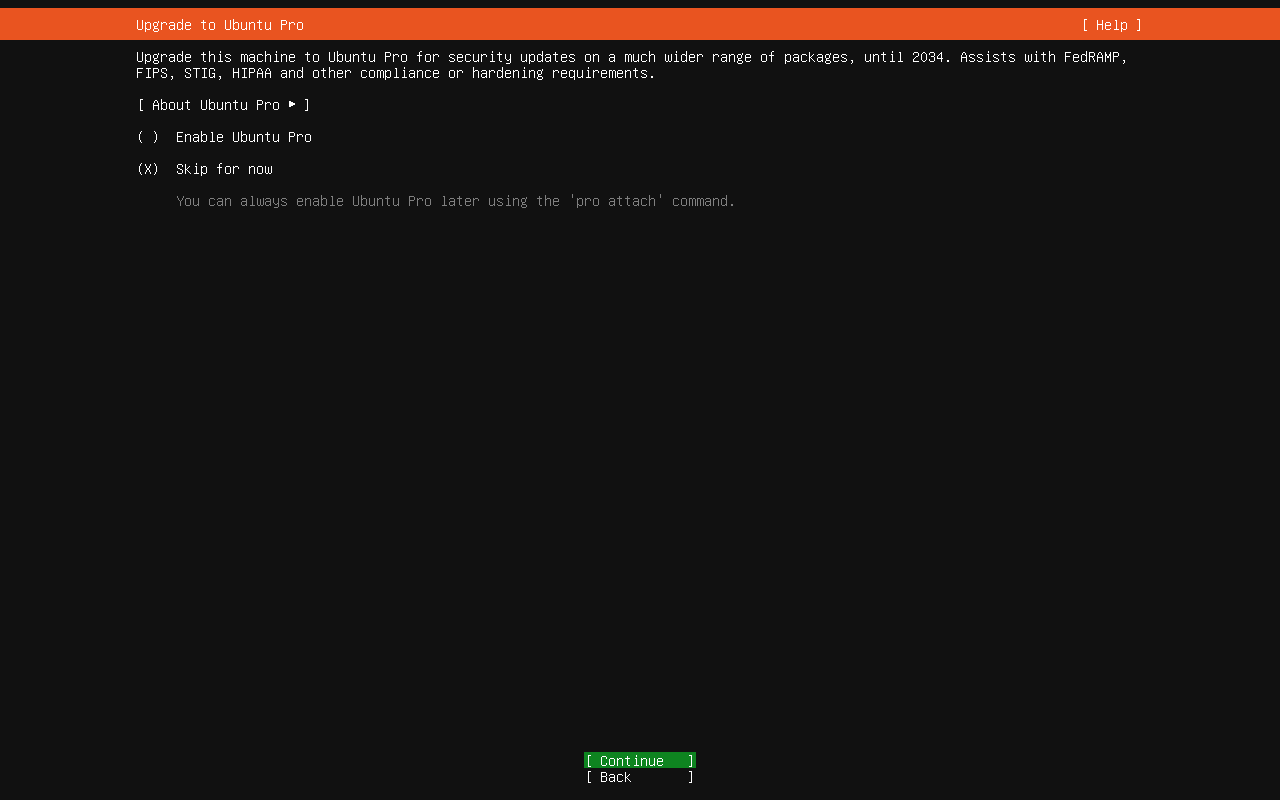
      boot11

      select  Skip and Continue

      boot12

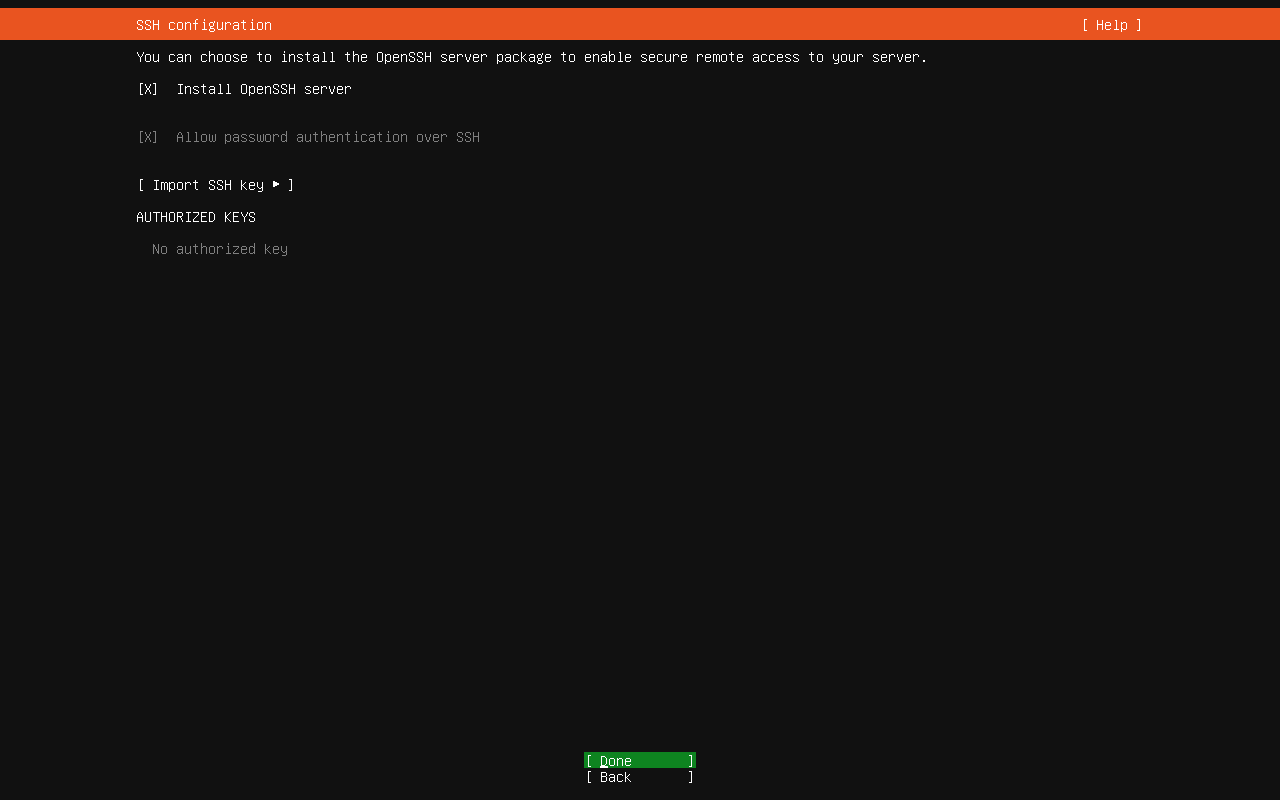
      Select Install ssh server and then select Done 
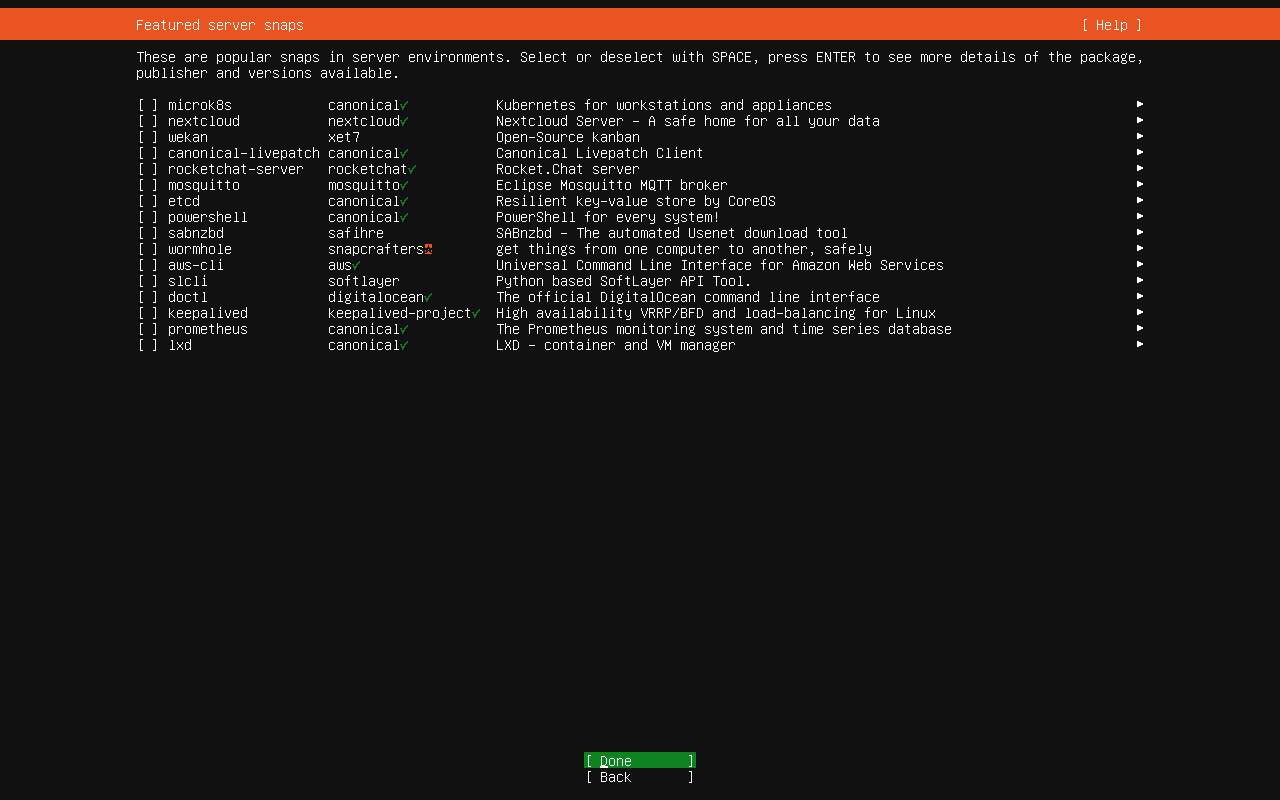
      boot13 

      Do not select any software just hit TAB and Select Done 
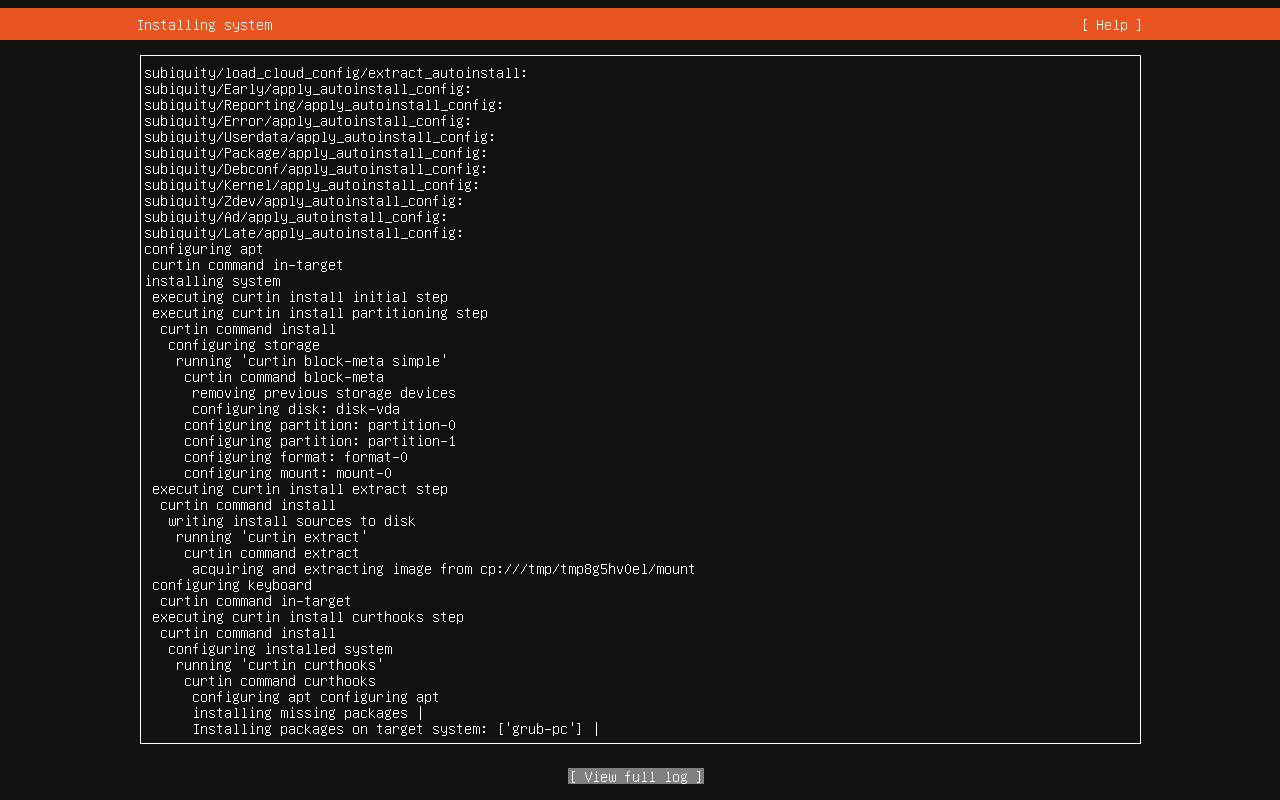
      boot14

      Now Wait Ubuntu installation started , time will depend on your  internet speed and machine configuration 
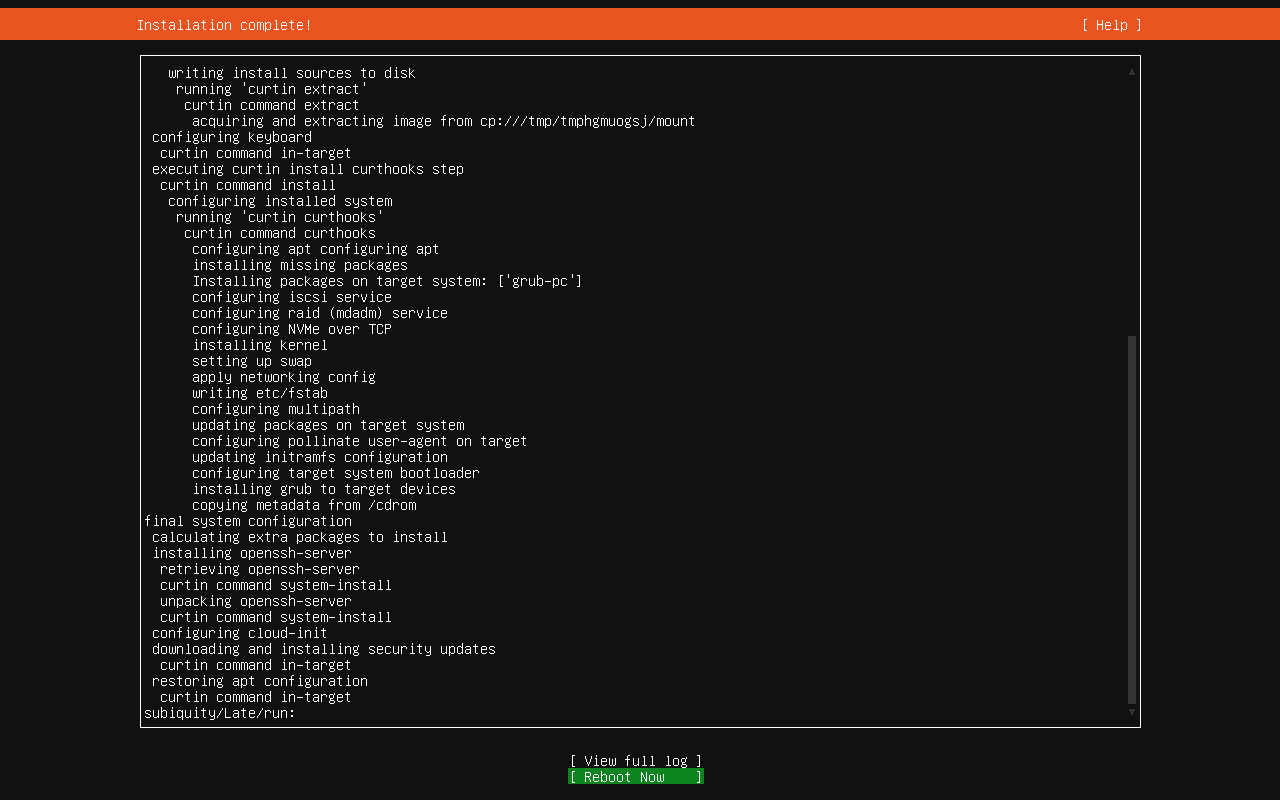
      boot15

      Once Installation finish screen will ask you to reboot .
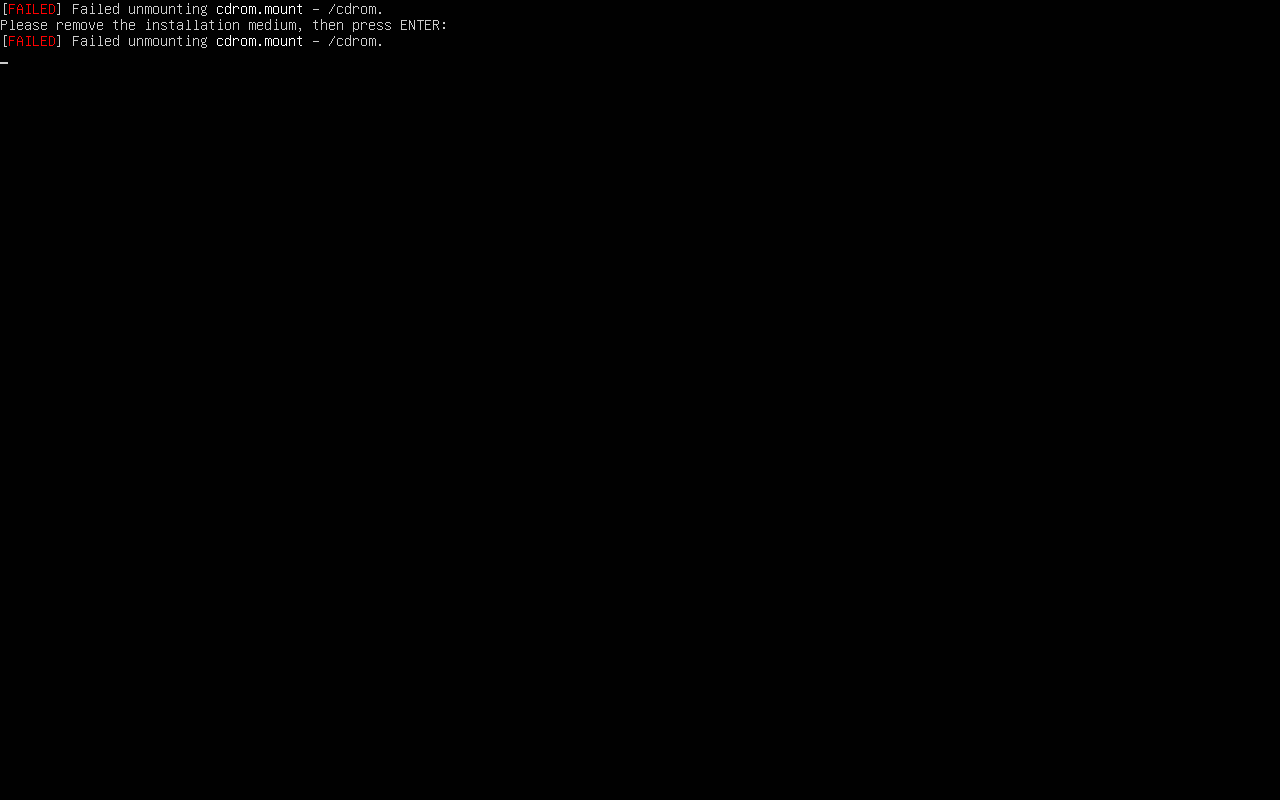
      boot16

      Remove Pen drive and Hit enter , Decide will reboot , After Reboot following screen will be visible .
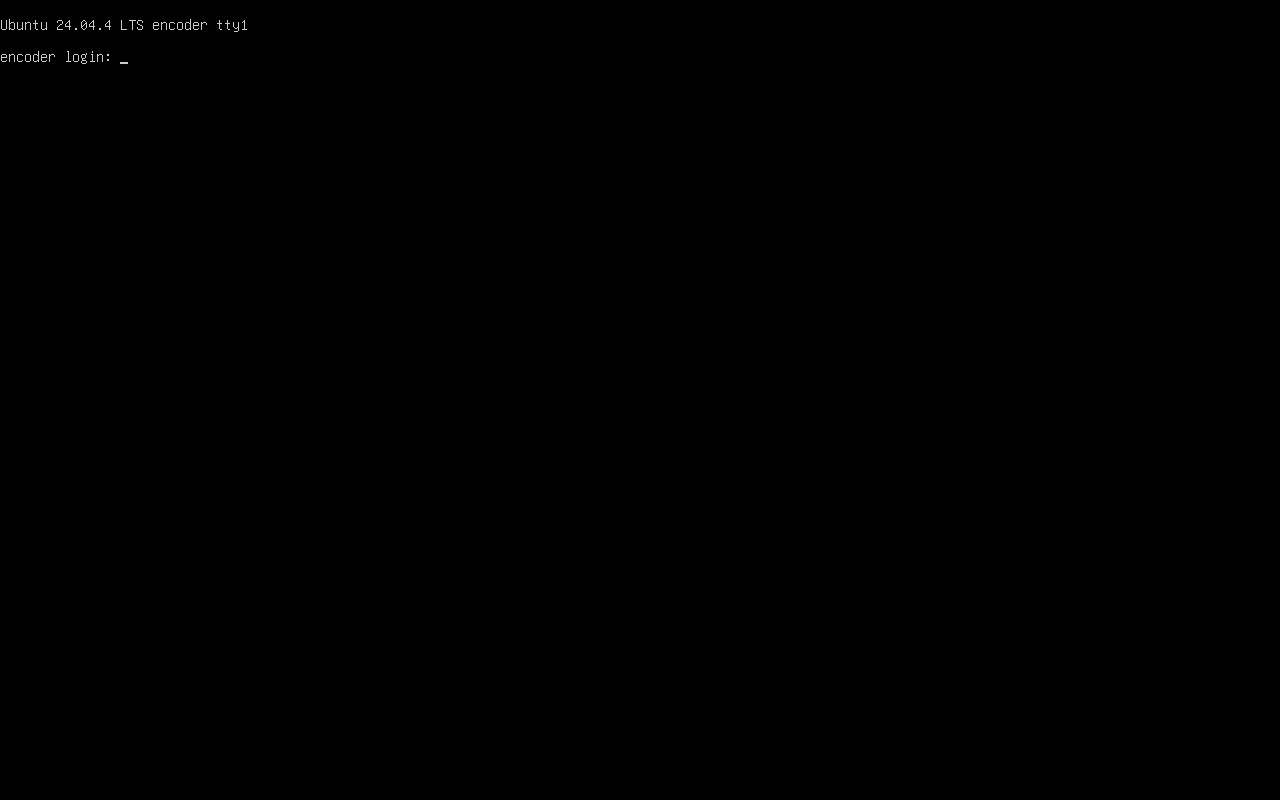
      boot17

      Congratulation Now system is ready to install all king of  software .